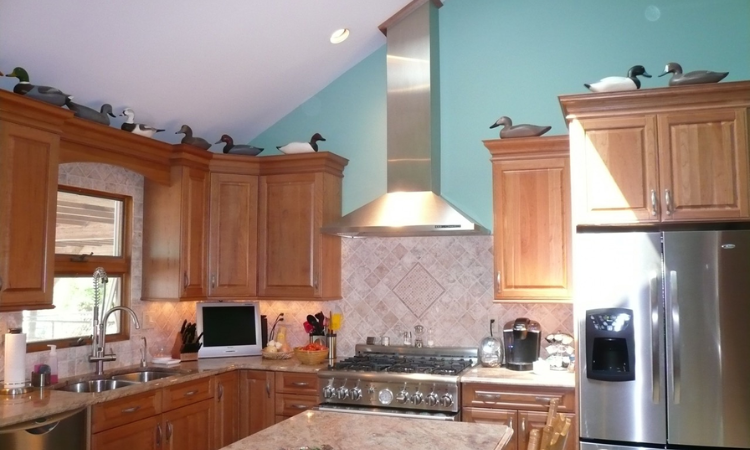
How To Install A Range Hood On A Slanted Ceiling?: Are you tired of smelling smoke and cooking in a kitchen with a slanted ceiling? Installing a range hood on a sloping ceiling can give your kitchen a modern look and improve ventilation. In this detailed instruction, we will show you how to install a range hood on a sloping ceiling.
Valuing Range Hoods and Their Importance
If you care about maintaining a clean and healthy kitchen, you need a range hood. They aid with the removal of oil, cooking odors, and airborne particles, keeping your kitchen smelling pleasant and feeling cozy. Even if there are a few differences between installing a range hood on a flat ceiling and one on a sloped ceiling, it is still possible to do the task with the right help.
Comprehensive Setup Guide
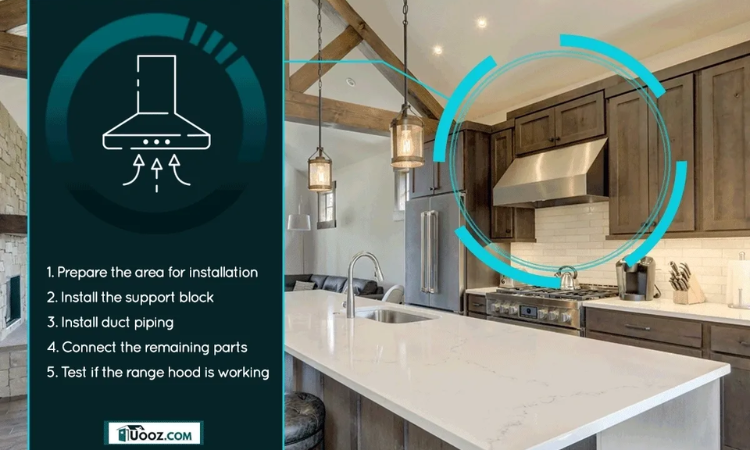
1. Gather All of Your Needed Items
Before you start installing anything, double-check that you have everything you’ll need. In addition to the range hood of your choosing, you may need a level, a pencil, a jigsaw, a screwdriver, and a stud finder.
2. Determine and Mark
Use a level and some measuring tape to find the sweet spot on the slanted ceiling where you want to install your range hood. Having it centered over your burner will yield the finest results.
3. Locate and Mark the Studs
A stud finder can help you locate the ceiling studs. Because of how important they are for installing the range hood, these spots should be marked.
4. Slash
To install the ducting for the range hood, use a jigsaw to cut a little hole. The duct will now connect to the hood and exit to the outdoors.
5. Get the range hood fixed.
Follow the manufacturer’s directions precisely while mounting the range hood. Verify that it is perpendicular to the ceiling and securely fastened using the marks you created earlier.
6. Fasten the duct
Fasten the ducting and fittings of the range hood. Seal and tighten the connection to prevent air from leaking.
7. Ensure the Setup Is Successful
Before you finish installing the range hood, make sure it is working properly. Check the airflow and listen for strange noises to make sure everything is okay.
How to Choose the Right Range Hood?
Before beginning the installation process, it is essential to select the correct range hood model for your kitchen. The dimensions of your stove, the layout of your kitchen, and your preferences should all be considered. Whether you’re looking for an under-cabinet, wall-mounted, or island hood, make sure it complements your kitchen’s style and meets your ventilation needs.
Installing It Yourself versus Hiring a Pro
Hire a professional or install the range hood yourself; the decision is yours to make based on your degree of comfort and competence with DIY projects. With confidence and experience in your talents, a do-it-yourself installation can be a pleasant and cost-effective option. If you’re not sure what you’re doing or if the installation seems too hard, it’s best to call in the pros to make sure everything is set up perfectly.
Fixes for Common Issues
Whether it’s due to uneven surfaces, tight spaces, or complicated ducting arrangements, installing a range hood on a sloping ceiling can be a challenge. A few fixes are as follows:
- When mounting the range hood, use shims to create a stable and level surface, especially if your ceiling is slanted.
- Space Constraints: If your ceiling is slanted, look for a range hood with a low profile or flexible mounting options so it can fit.
- Consider flexible ducting for complex ducting, as it can more easily navigate the curves and turns of a sloping ceiling. Another option is to have the ductwork custom-made by experienced installers.
Maintenance Reminders
Your range hood will last longer and work better after installation if you maintain it regularly. Follow these rules:
- Regular Cleaning: Wipe down the exterior surfaces and filters often to prevent the buildup of grease.
- Inspect and Change Filters: If your range hood has filters, check the manufacturer’s instructions to see how often to change them.
- Ventilation Duct Inspection: From time to time, inspect the ducting for buildup or obstacles that might hinder airflow.
To conclude
Installing a range hood on a slanted ceiling may transform your kitchen. It adds visual appeal and provides practical ventilation. Whether you decide to tackle the process on your own or bring in a professional, the key is to be well-prepared and meticulous. Your kitchen will be odor-free and immaculate every time you cook if you install the right range hood. Import is a breeze!
I hope you like the part where we talked about Best Juicer For Beets For more content like this, visit our website Kitchenmatts.com.